Step 1: 3D Print the Parts
have provided all the main parts to be printed in the 'Downloads' section.
List of parts to be printed:
- 2x- arm-to-servo.
- 1x- face.
- 2x- fore-arm-to-servo.
- 2x- hex-bolt-holder.
- 2x- linear-actuator-body.
- 2x- linear-actuator-motor-holder.
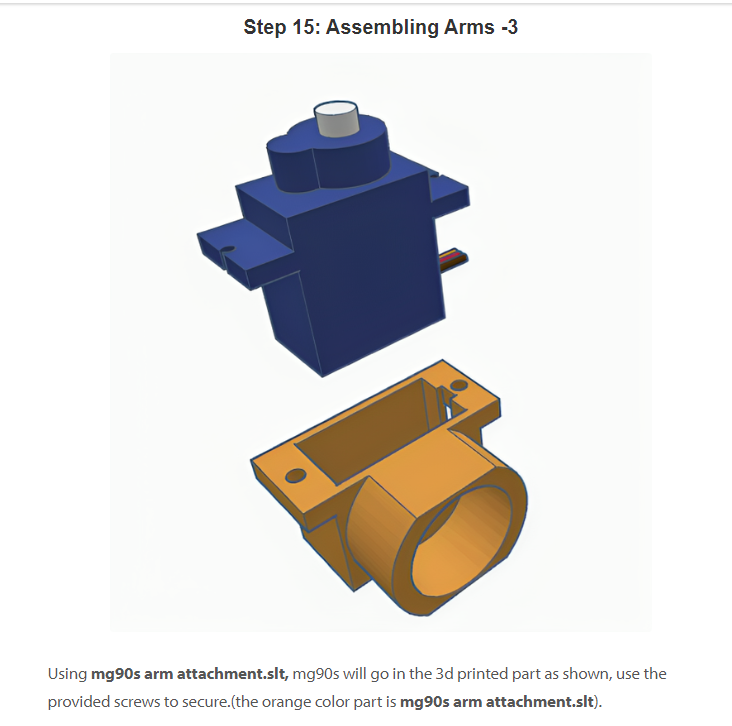
- 2x- mg90s arm attachment.
- 1x- neck.
- 2x- shoulder.
- 2x- shoulder-servo-holder.
- 2x- threaded-rod-to-motor-shaft-connector.
- 1x- linear-actuator-mount.
- 2x- linear-actuator-cap.
The parts were printed in the following Cura settings on my ender 3:
- layer height - 0.3mm
- 0.4mm nozzle
- 20% infill
- infill pattern - cubic
- support structure - normal
The project only requires about 1kg of PLA filament.
If the screws do not fit the holes in the 3d printed parts, use a soldering iron insert the screw.
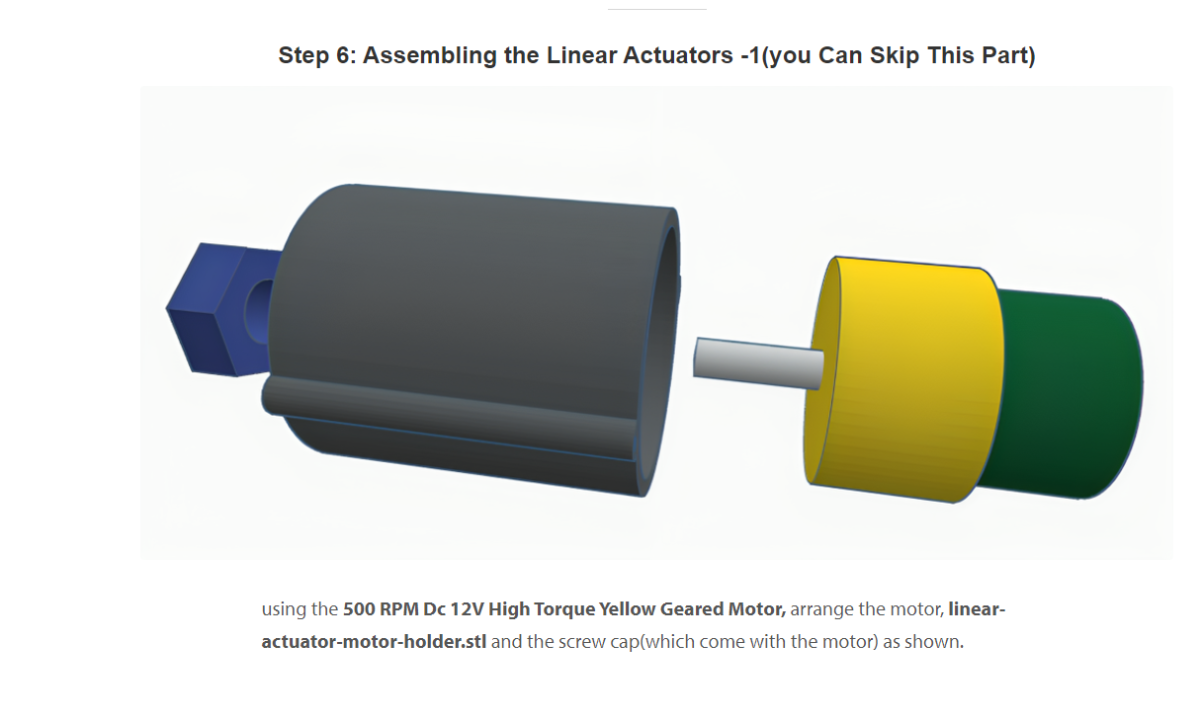
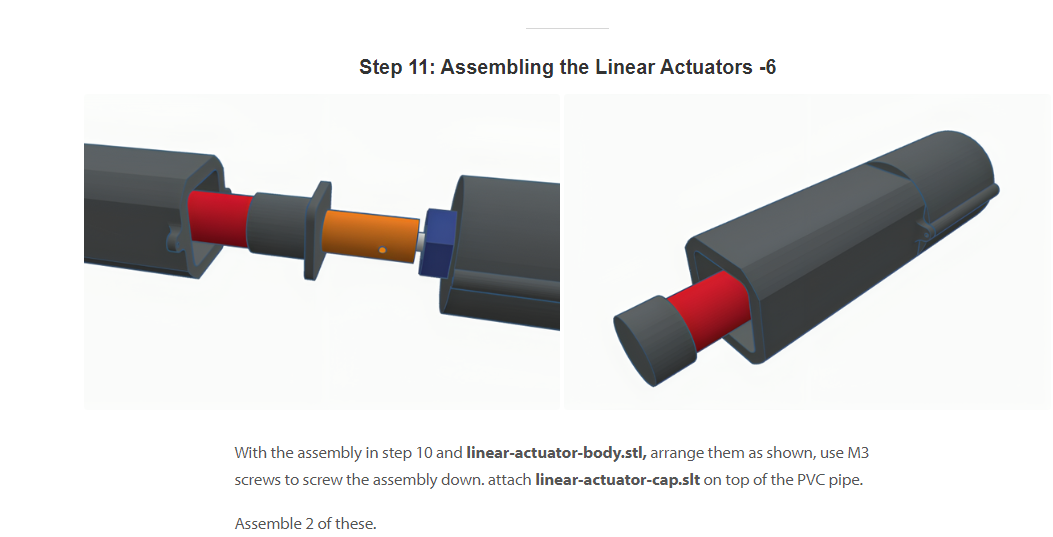
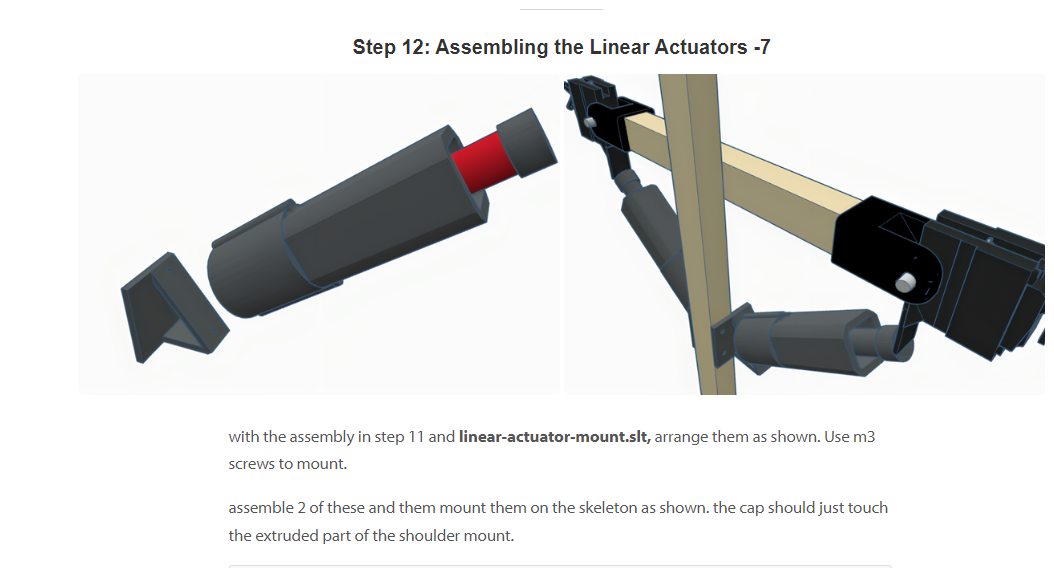
NOTE: I HAVE NOT PROVIDED THE schematic FOR THE LINEAR ACTUATORS. If you want them to work then use the code to figure out the connections yourself(i have provided assembly details from 'step-6'). the actuators are not for the main purpose of this robot and can be used for aesthetic purposes. int in3=9; 9int in4=11; are the pins for PWM to a L298N motor driver.
Step 2: Assemble the Servo Joint.png)
In the image, the green part is shoulder-servo-holder.stl. The Mg996R servo will go in as shown. Use the provided screws with the servo to secure the servo in place.
Step 3: Assemble the Shoulder Mount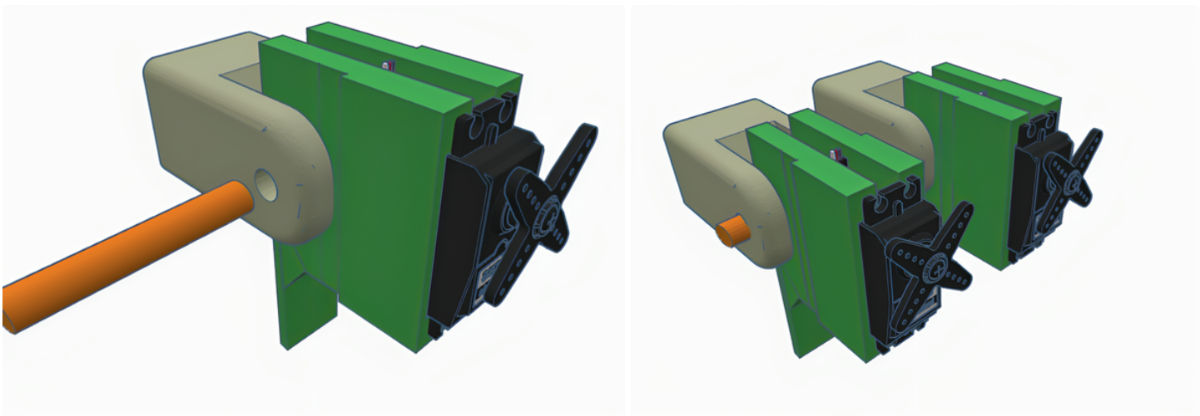
Arrange the previously assembled part and shoulder.stl as shown. Use the 'M8 screw with hex bolts. (more than 60mm)' to join then in place. The screw goes inside the hole and the bolt is screwed down from the other end. Make sure that the servo is free up move up and down.
Assemble 2 of these
Step 4: Make the Skeleton of the Robot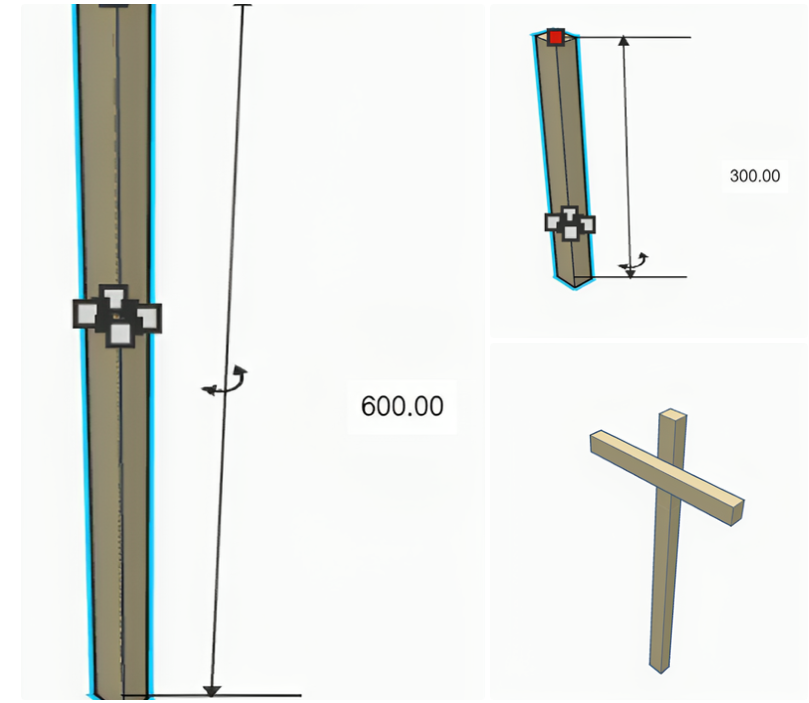
- With the 31mm x 24mm x 600mm wooden plank and 31mm x 24mm x 300mm wooden plank, make a cross-shape as shown.
- The distance between the top of the vertical plank to the side of the horizontal plank is 77mm.
Step 5: Attach the Shoulder Mount to the Sides of the Skeleton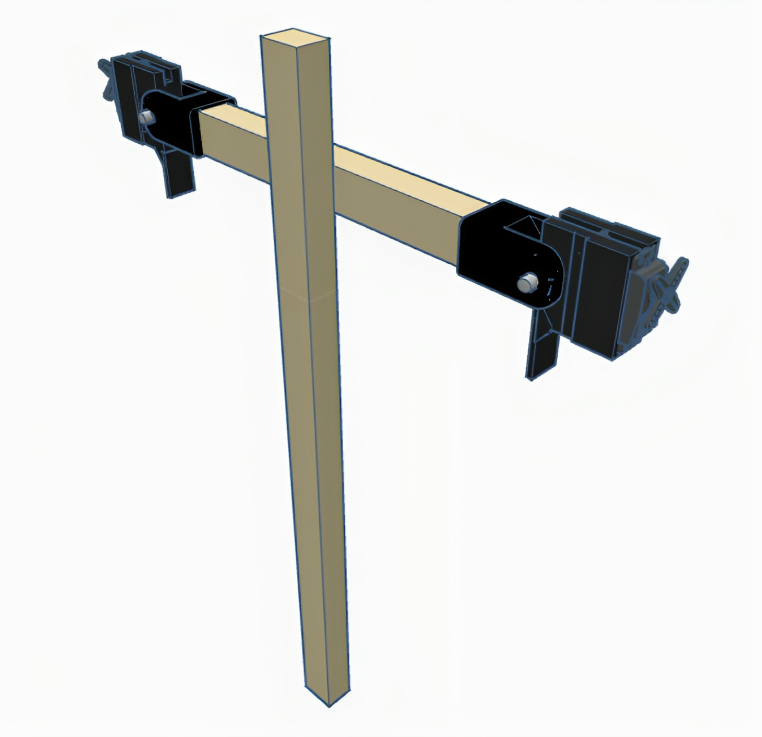
Attach the shoulder mount to the sides of the skeleton as shown.
Make sure the direction of the shoulder mount is correct. The extruded part should face downwards.
.png)
.png)
.png)
.png)
Here is the video of the build process
check out the shorts on my channel for it working in action.
Step 24: CODE
Main python file - chad.py
face tracking python file - face-tracking.py
Main Arduino file - humanoid_robot_sketch-1.ino
face tracking Arduino file - face_tracking.ino
E1 is right elbow servo
S1 is right shoulder servo
E2 is left elbow servo
S2 is right shoulder servo
For both voice command and face recognition to work simultaneously, run one file in one IDE and the other file in the other IDE. I used vs code and python IDLE.
the database for the chatbot is in database.json. make sure it is in the same folder as main.py
you can find the code in the code section

Applications of CHAD in real life:
- For people (especially elders) suffering from loneliness or depression, chad can be programmed to interact with them to make them feel better and less lonely. It can act as a physical companion for elderly people.
- CHAD can be used for entertainment
- For people just starting out in robotics, CHAD can be a good project to make as it is very budget friendly and somewhat easy to assemble given the 3d models and code. Making CHAD will help kids develop an interest in the fields of STEM and especially robotics.
- Although CHAD was developed for robot-human interaction, with some modification CHAD will be able to lift objects and manipulate its environment.
Many enthusiasts dream of building android-style humanoid robots, but the reality is that these robots are incredibly complex and expensive. For those young minds eager to start somewhere, CHAD is a great project to build. I believe humanoid robots can change the world for better. CHAD is a step forward towards that future.